The Default Autoresponder and Default List are the starting point for every funnel. Any funnel without its own provider or list uses these two settings, so one choice here sets up all 96 funnels at once.
Where to find it:

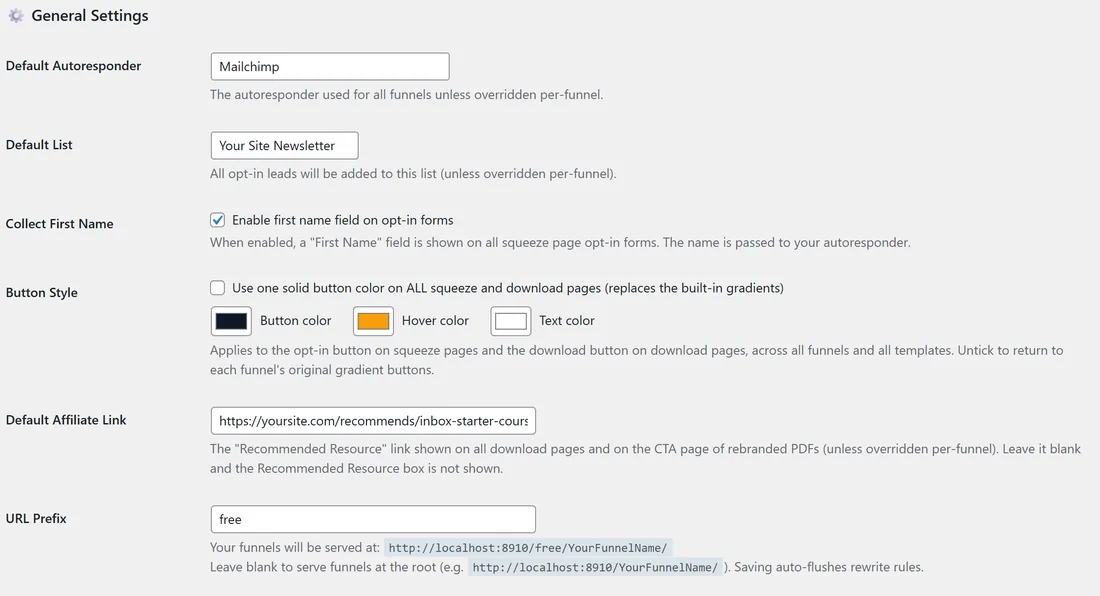
Free List Building, then the Settings tab. Scroll past the License panel to General Settings. Default Autoresponder and Default List are the first two rows.
Default Autoresponder:
A drop-down of every provider. It starts with:
- None (AWeber legacy form): no provider. Funnels show the plain form built into each squeeze page.
- AWeber (Legacy Form Mode): AWeber by list name, no API key.
Then the other providers by name, for example Mailchimp, ActiveCampaign, ConvertKit (Kit) and GetResponse. Providers you have not connected yet show "(Not Connected)" and cannot be picked. Connect them first on the Autoresponders tab.
Default List:
This row appears once you pick a provider other than AWeber.
- If the provider's lists could be loaded, you get a drop-down with "Select a list" and your list names.
- Otherwise you get a text box. Type the list ID by hand.
When you pick AWeber (Legacy Form Mode), an AWeber List Name box appears instead. Type your list name, for example awlist0000000.
One shared Default List:
The Default List is a single value for all providers. If one funnel uses a different provider and has no list of its own, it is given this same value. When you give a funnel its own provider, set its own list on the funnel's Edit page too.
Step by step:
- Connect your autoresponder on the Autoresponders tab.
- Open Settings and find Default Autoresponder.
- Pick your provider.
- Pick your list in Default List (or type the list ID, or the AWeber list name).
- Click Save Settings at the bottom of the form, or the Save Settings button in the bar that stays at the bottom of the screen.
A real example:
Sam connects Mailchimp on the Autoresponders tab. In Settings Sam picks Mailchimp as the Default Autoresponder and "Your Site Newsletter" as the Default List, then clicks Save Settings. Every funnel without its own setting now sends new subscribers to Your Site Newsletter. The Lists tab shows them as Connected.
Tips:
- The default list can also be chosen on each provider's card on the Autoresponders tab, with the Default List drop-down.
- To send one funnel somewhere else, see Default Autoresponder vs Per-Funnel Overrides.
- After saving, open the Lists tab to confirm every funnel shows Connected (see Funnel Connection Status).