A new TimeTrackr has no accounts yet, so the first page anyone sees is the setup wizard. You fill it in once, and it makes you the owner.
The wizard:
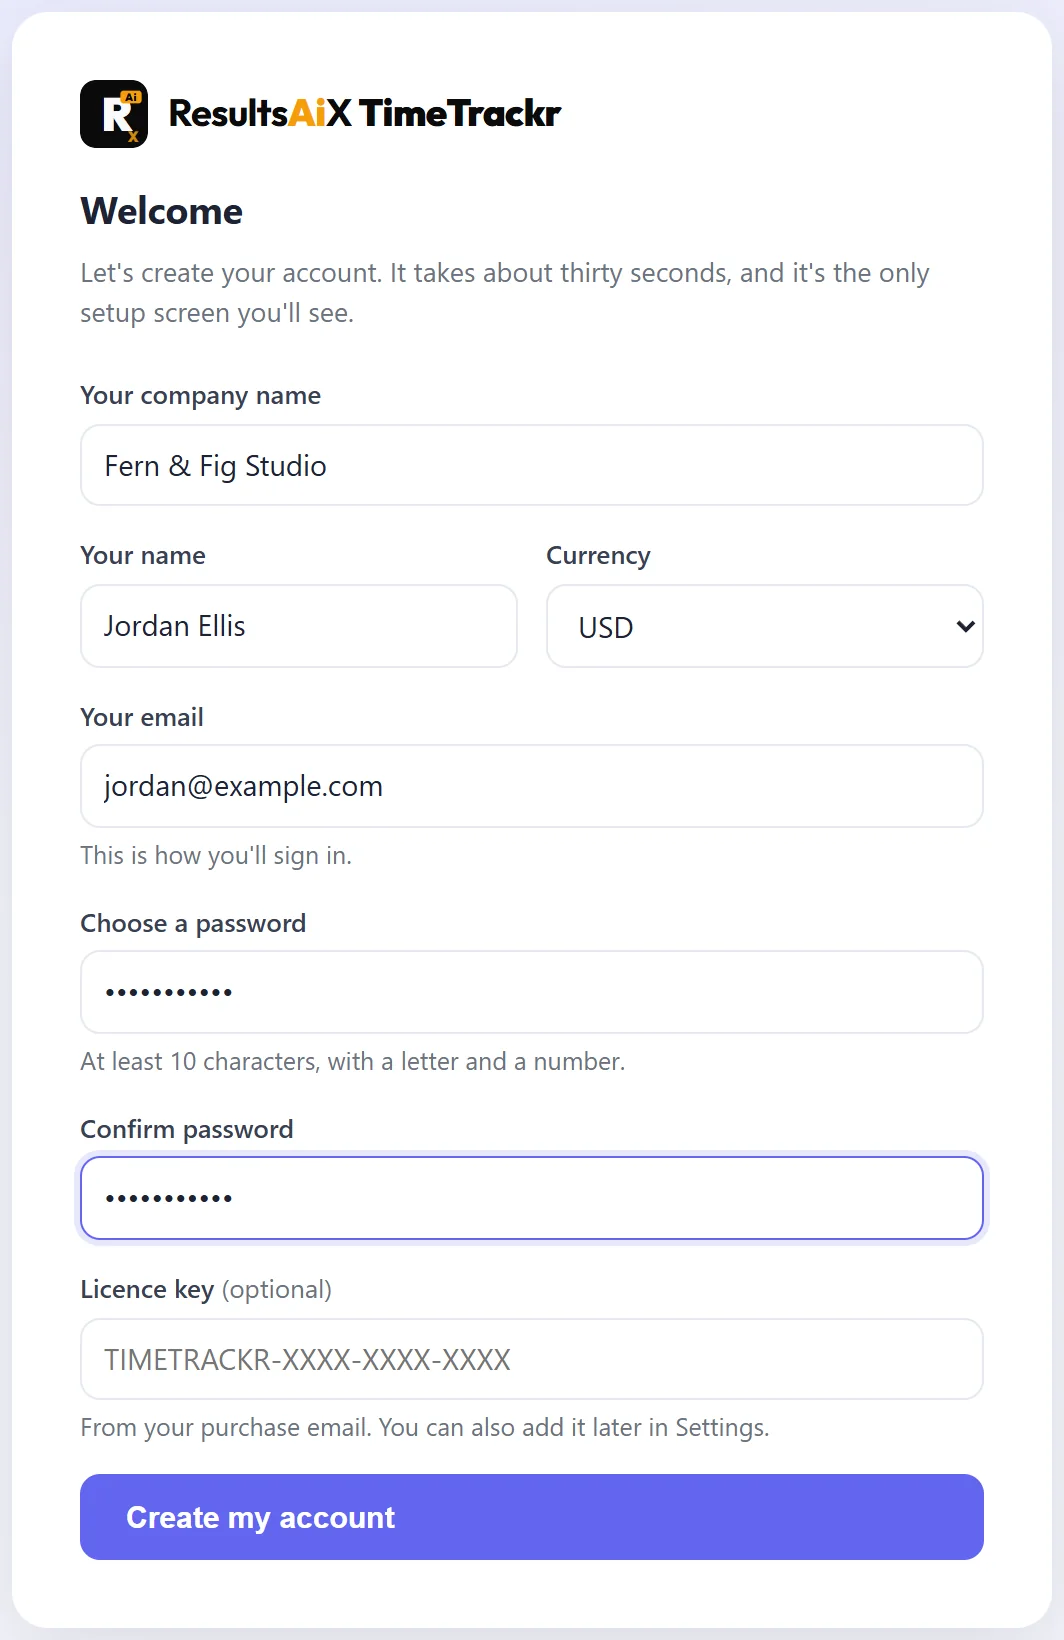
- Your company name. Shown to your team when they sign in, for example Fern & Fig Studio.
- Your name.
- Currency. The currency for hourly rates and wages: USD, EUR, GBP, AUD or CAD. You can change it later in Settings.
- Your email. This is how you sign in.
- Choose a password, and Confirm password. At least 10 characters, with a letter and a number.
- Licence key (optional). Paste your TIMETRACKR key here. You can also add it later under Settings, Licence.
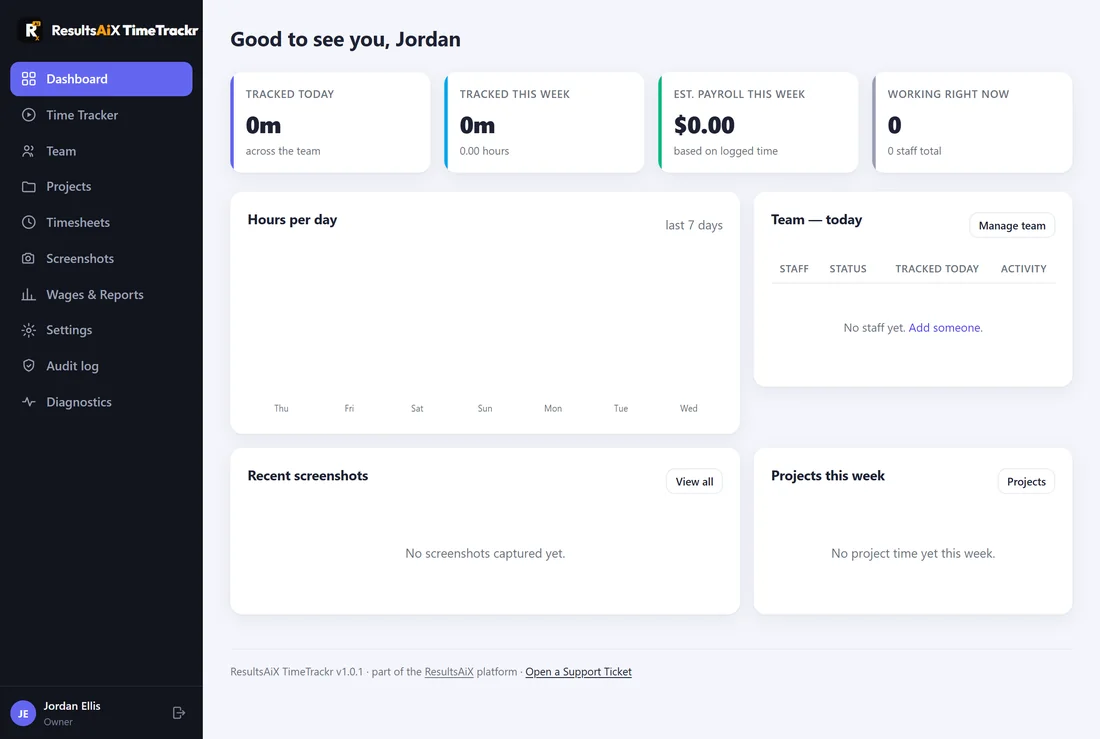
Press Create my account. You are signed in and land on your dashboard. Nobody else can run the wizard after this.
A worked example:
Jordan runs Fern & Fig Studio, a small design studio at yoursite.com. Jordan types the company name, chooses USD, uses jordan@example.com, picks a password, pastes the licence key and presses Create my account. The dashboard opens, empty and ready.
What to do next:
- Add your projects. See Projects, Tasks And Client Rates.
- Add your team. See Adding Your Team.
- Choose how often screenshots are taken. See Settings: Company, Monitoring And Currency.
- Send your team the welcome message. See A Ready-Made Welcome Message For Your Team.