Sometimes the best testimonial arrives by email, in a message or on a call note. The editor lets you add it yourself in a minute, with the right product, date and photo. The same screen opens when you click Edit on any testimonial.
Where to find it:
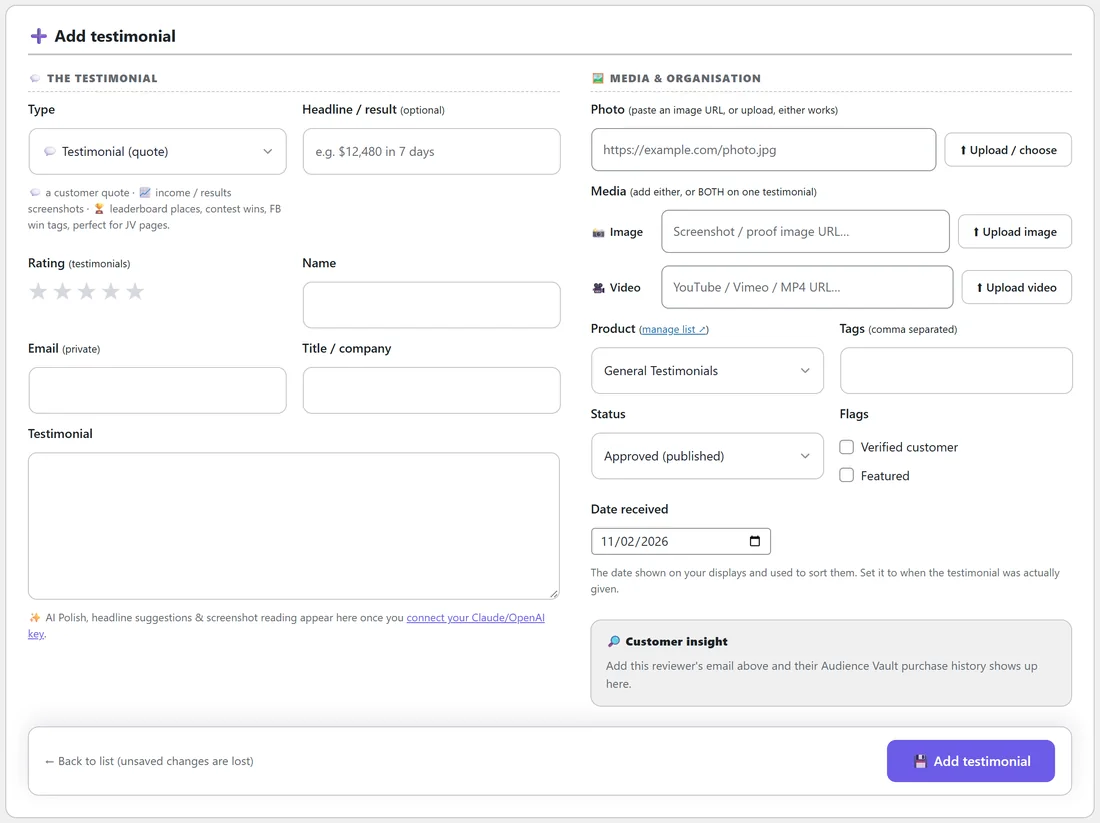
Click the purple Add Testimonial button at the end of the tab row, or Add New under AiX Testimonials in the sidebar. To change an existing one, click Edit on its row in the Testimonials tab.
The testimonial:
The left side, THE TESTIMONIAL, holds the words:
- Type: Testimonial (quote) for a customer quote, Result / Proof (screenshot) for results screenshots, or JV Proof (leaderboards & wins) for leaderboard places and contest wins on JV pages
- Headline / result (optional): a short line shown in bold above the text, for example Stronger at 42 than at 25
- Rating (testimonials): click the stars, 1 to 5
- Name
- Email (private): never shown on your site
- Title / company: shown under the name, for example Nurse and mum of two
- Testimonial: the words themselves
Media and organisation:
The right side, MEDIA & ORGANISATION:
- Photo: paste an image address, or click Upload / choose to pick one from your Media Library. With no photo, the plugin shows the reviewer's Gravatar, or their first initial.
- Media: an Image (a screenshot or proof image) and a Video (a YouTube, Vimeo or MP4 address, or Upload video). You can add either, or both on one testimonial.
- Product: pick from your list, or choose Add new product to type a new one. The manage list link opens the Products tab.
- Tags (comma separated)
- Status: Approved (published), Embed-only (hidden unless placed), Pending review, Spam or Trash
- Flags: Verified customer and Featured
- Date received: the date shown on your displays and used to sort them. Set it to when the testimonial was actually given.
Customer insight:
The Customer insight box looks up the reviewer's email in your Audience Vault, when WP Conversion Tracker and its Audience Vault are on this site, and shows what they bought. It updates as you type the email.
Adding a testimonial:
- Click Add Testimonial.
- Choose the Type and type the Name and Testimonial.
- Click the stars for the rating.
- Add the email, title, product, tags and any photo or media.
- Set the Status. Approved (published) puts it live straight away.
- Set Date received to the day the customer sent it.
- Click Add testimonial.
You land on the list where it lives, with the new row highlighted and the message Testimonial added.
Editing a testimonial:
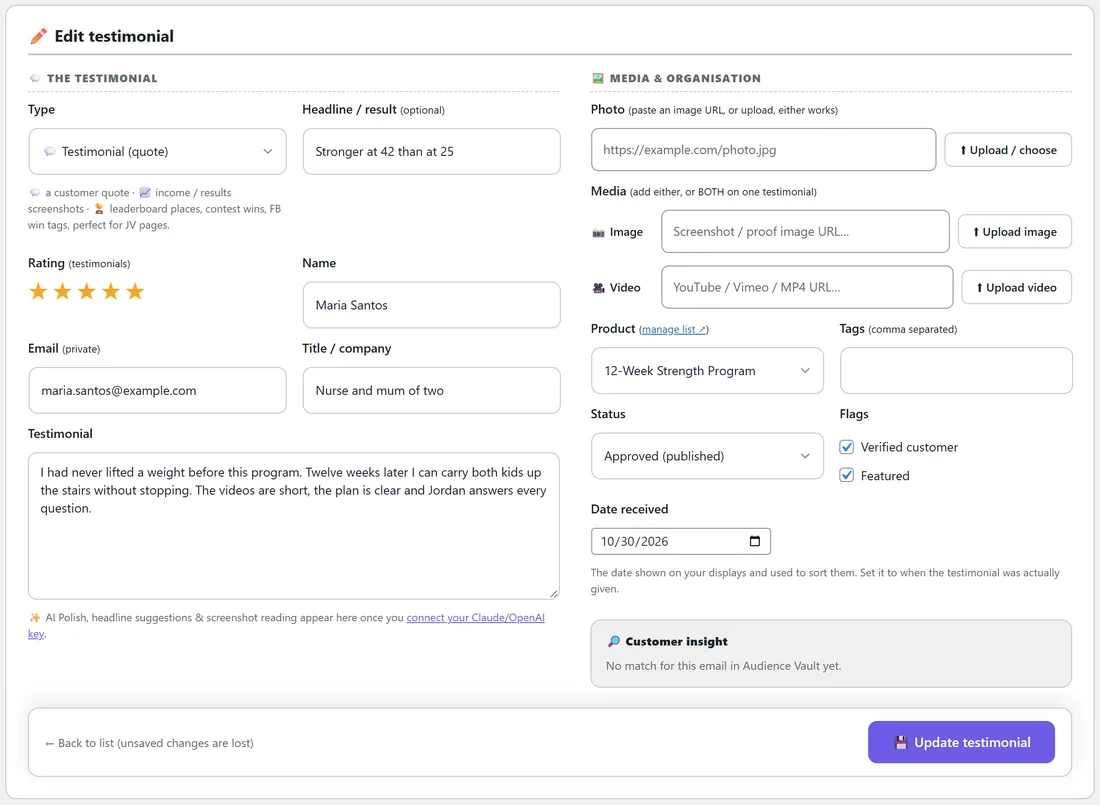
- Click Edit on its row.
- Change what you need.
- Click Update testimonial.
Changing an existing testimonial to Approved (published) here counts as approving it, so the gift and thank-you email go out if they are on. Adding a brand new testimonial yourself never sends them.
A real example:
Maria Santos emailed Jordan after finishing the 12-Week Strength Program. Jordan clicks Add Testimonial, pastes her words, adds the headline Stronger at 42 than at 25, gives 5 stars, sets the product to 12-Week Strength Program, ticks Verified customer and Featured, and sets Date received to the date of her email. It shows on the strength program page the same minute.
Results and proof entries:
For a screenshot of a result, choose Result / Proof (screenshot), write the result as the headline, for example Squat up from 60 kg to 90 kg, and add the screenshot under Media, Image. Results show in proof galleries with click to zoom. See Star Ratings, Verified Badges & Media Testimonials.
With an AI key:
With a key connected, AI Polish, headline suggestions and screenshot reading appear under the Testimonial box. AI never changes a customer's words without you approving it.
Tips:
- Always ask the customer before you publish words they sent you privately.
- Use the headline for the result in a few words. Visitors read it first.
- Use Embed-only for a testimonial you want only on one page, then place it with its Shortcode button.