The words on your banner are the first thing a visitor reads, so they should say plainly what your cookies are for. This guide covers the wording, the two policy links, the ten built-in languages and the names of the five groups.
Where to find it:
AiX Consent, Banner tab. The boxes are What it says, The links on it, Your visitor's own language and What each group is called. Press Save the banner when you are done.
What it says:
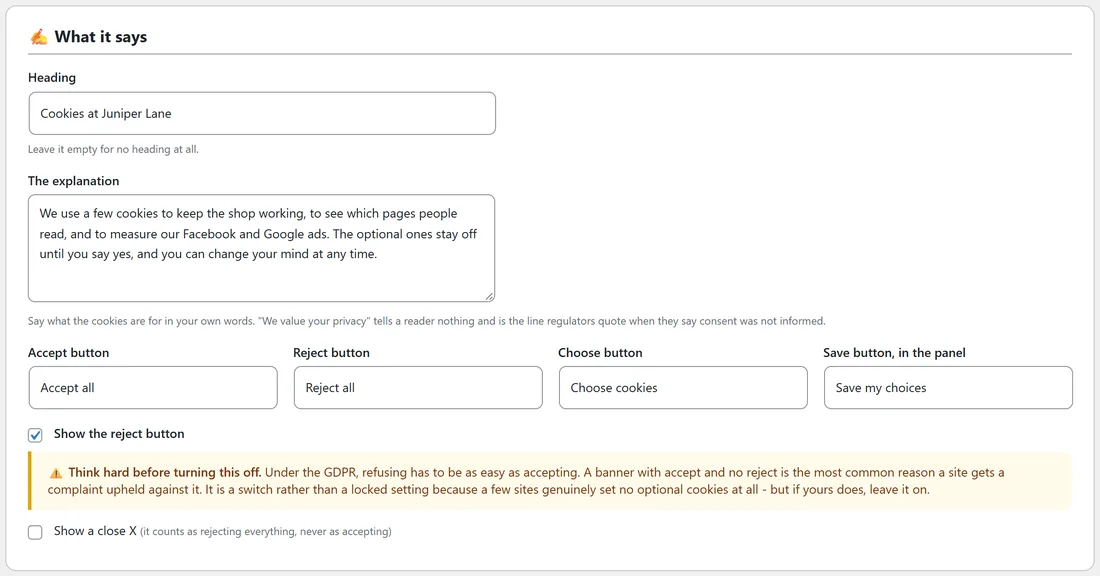
This box holds every word on the banner and on its buttons.
- Heading. Starts as We use cookies. Leave it empty for no heading at all.
- The explanation. The main message under the heading.
- Accept button. Starts as Accept all.
- Reject button. Starts as Reject all.
- Choose button. Starts as Choose cookies. It opens the choices panel.
- Save button, in the panel. Starts as Save my choices.
Below the buttons are Show the reject button, ticked from the start, and Show a close X, which counts as rejecting everything when pressed.
Wording that works:
- Name what you actually use: page counts, advertising measurement, embedded video.
- Say what happens if they say no. Usually the site works just the same.
- Keep it short. Two sentences are read; a paragraph often is not.
- Match the button words to the action, so Accept all and Reject all say exactly what they do.
A real example:
Juniper Lane Pottery uses this. Heading: Cookies at Juniper Lane Explanation: We use a few cookies to keep the shop working, to see which pages people read, and to measure our Facebook and Google ads. The optional ones stay off until you say yes, and you can change your mind at any time.
The links on it:

Four fields sit side by side.
- Cookie policy page: the address of your cookie policy.
- Its link text: starts as Cookie policy.
- Privacy policy page: the address of your privacy policy.
- Its link text: starts as Privacy policy.
Leaving an address blank removes that link from the banner. Set Me Up fills in the cookie policy address when it builds the page, and fills in the privacy policy address when WordPress has a privacy policy page set. Creating the Cookie Policy on the Policies tab fills the address in too, when the field is still empty.
Your visitor's own language:
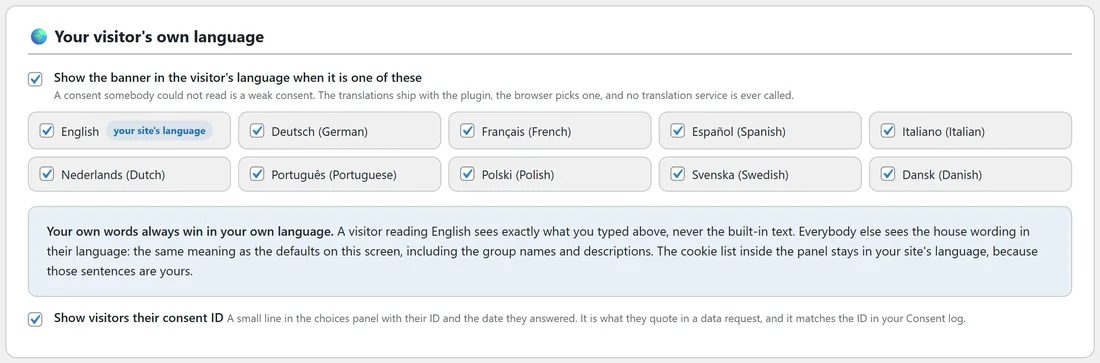
Ten languages ship with the plugin: English, Deutsch (German), Français (French), Español (Spanish), Italiano (Italian), Nederlands (Dutch), Português (Portuguese), Polski (Polish), Svenska (Swedish) and Dansk (Danish). Your site's own language is marked your site's language.
With Show the banner in the visitor's language when it is one of these ticked, the visitor's browser picks the language. No translation service is called, and the page is identical for everybody, so it works behind any page cache.
How the languages work:
- Your own words always win in your own language. A visitor reading your site's language sees exactly what you typed.
- Everybody else sees the built-in wording in their language: the banner, the group names, the descriptions and the text on video placeholders.
- The cookie list inside the panel stays in your site's language, because those sentences are yours.
- Untick a language and those visitors see your own wording instead. Untick them all and the feature is off.
Showing the consent ID:
Show visitors their consent ID, at the bottom of the same box, is ticked from the start. It adds a small line to the choices panel with the visitor's consent ID and the date they answered. It is what they quote in a data request, and it matches the ID in your Consent log.
What each group is called:
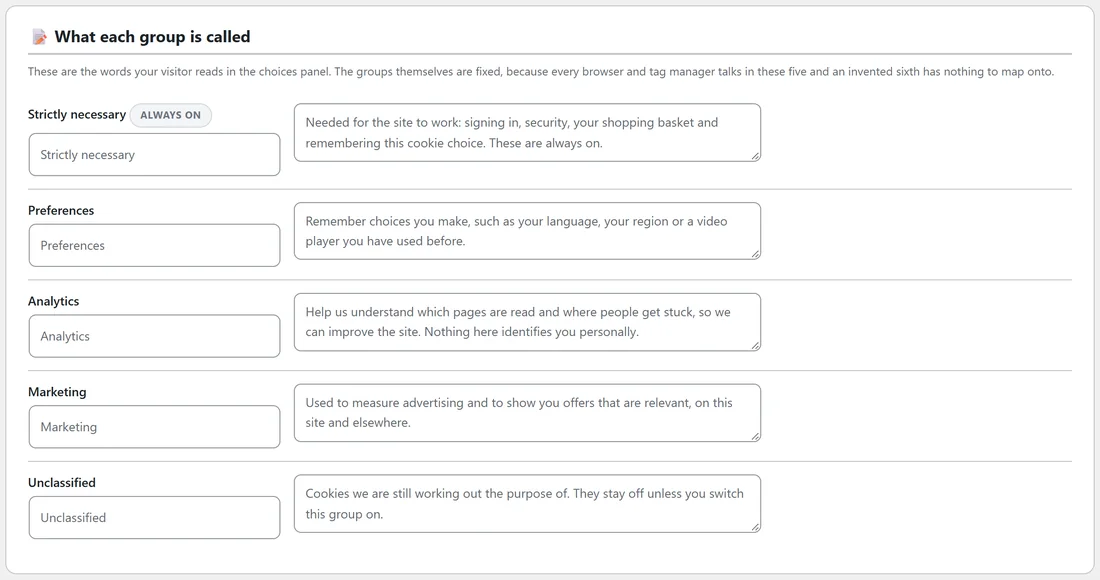
The last box lists the five groups: Strictly necessary (marked ALWAYS ON), Preferences, Analytics, Marketing and Unclassified. For each you can type a new name and a new description. Leave a field empty to keep the built-in wording, which is shown in grey as a hint.
The groups themselves are fixed. Only their names and descriptions are yours to change.
Step by step:
- Open the Banner tab and scroll to What it says.
- Write your Heading and The explanation.
- Check the four button words.
- Under The links on it, check the two addresses and their link text.
- Under Your visitor's own language, untick any language you would rather not offer.
- Rename any group under What each group is called, if you want to.
- Press Save the banner, then check the live preview.
Tips:
- After changing what you ask about, for example adding a new tracker, think about Ask everyone again on the Settings tab. See Letting Visitors Change Their Mind: Reopen Button, Shortcode And Consent ID.
- Keep group descriptions to one sentence each. Visitors read them in the choices panel, often on a phone.
Next steps:
See The Five Cookie Categories Explained for what each group covers, and Designing The Cookie Banner: Layouts, Colours, Presets And Live Preview for the look.